Hi Dave,
Hope you and Sarah and the kids are doing well. Thinking about you often these days. Well, as promised here is some info about the raised beds.

First thing to do is fine a location, level the area and build a frame. We used cedar because it is rot resistant but it can be expensive. Douglas fir boards will work too but may not last for years and years. Any dimensions will do, ours are 10 feet by 40 inches because it fit the space. Not having to cut the 10’ boards was a bonus. But even smaller 4x4 foot beds are great. I screwed these together with 3 inch exterior screws. Get more than you think you will need.
Put your frame in place and level it.

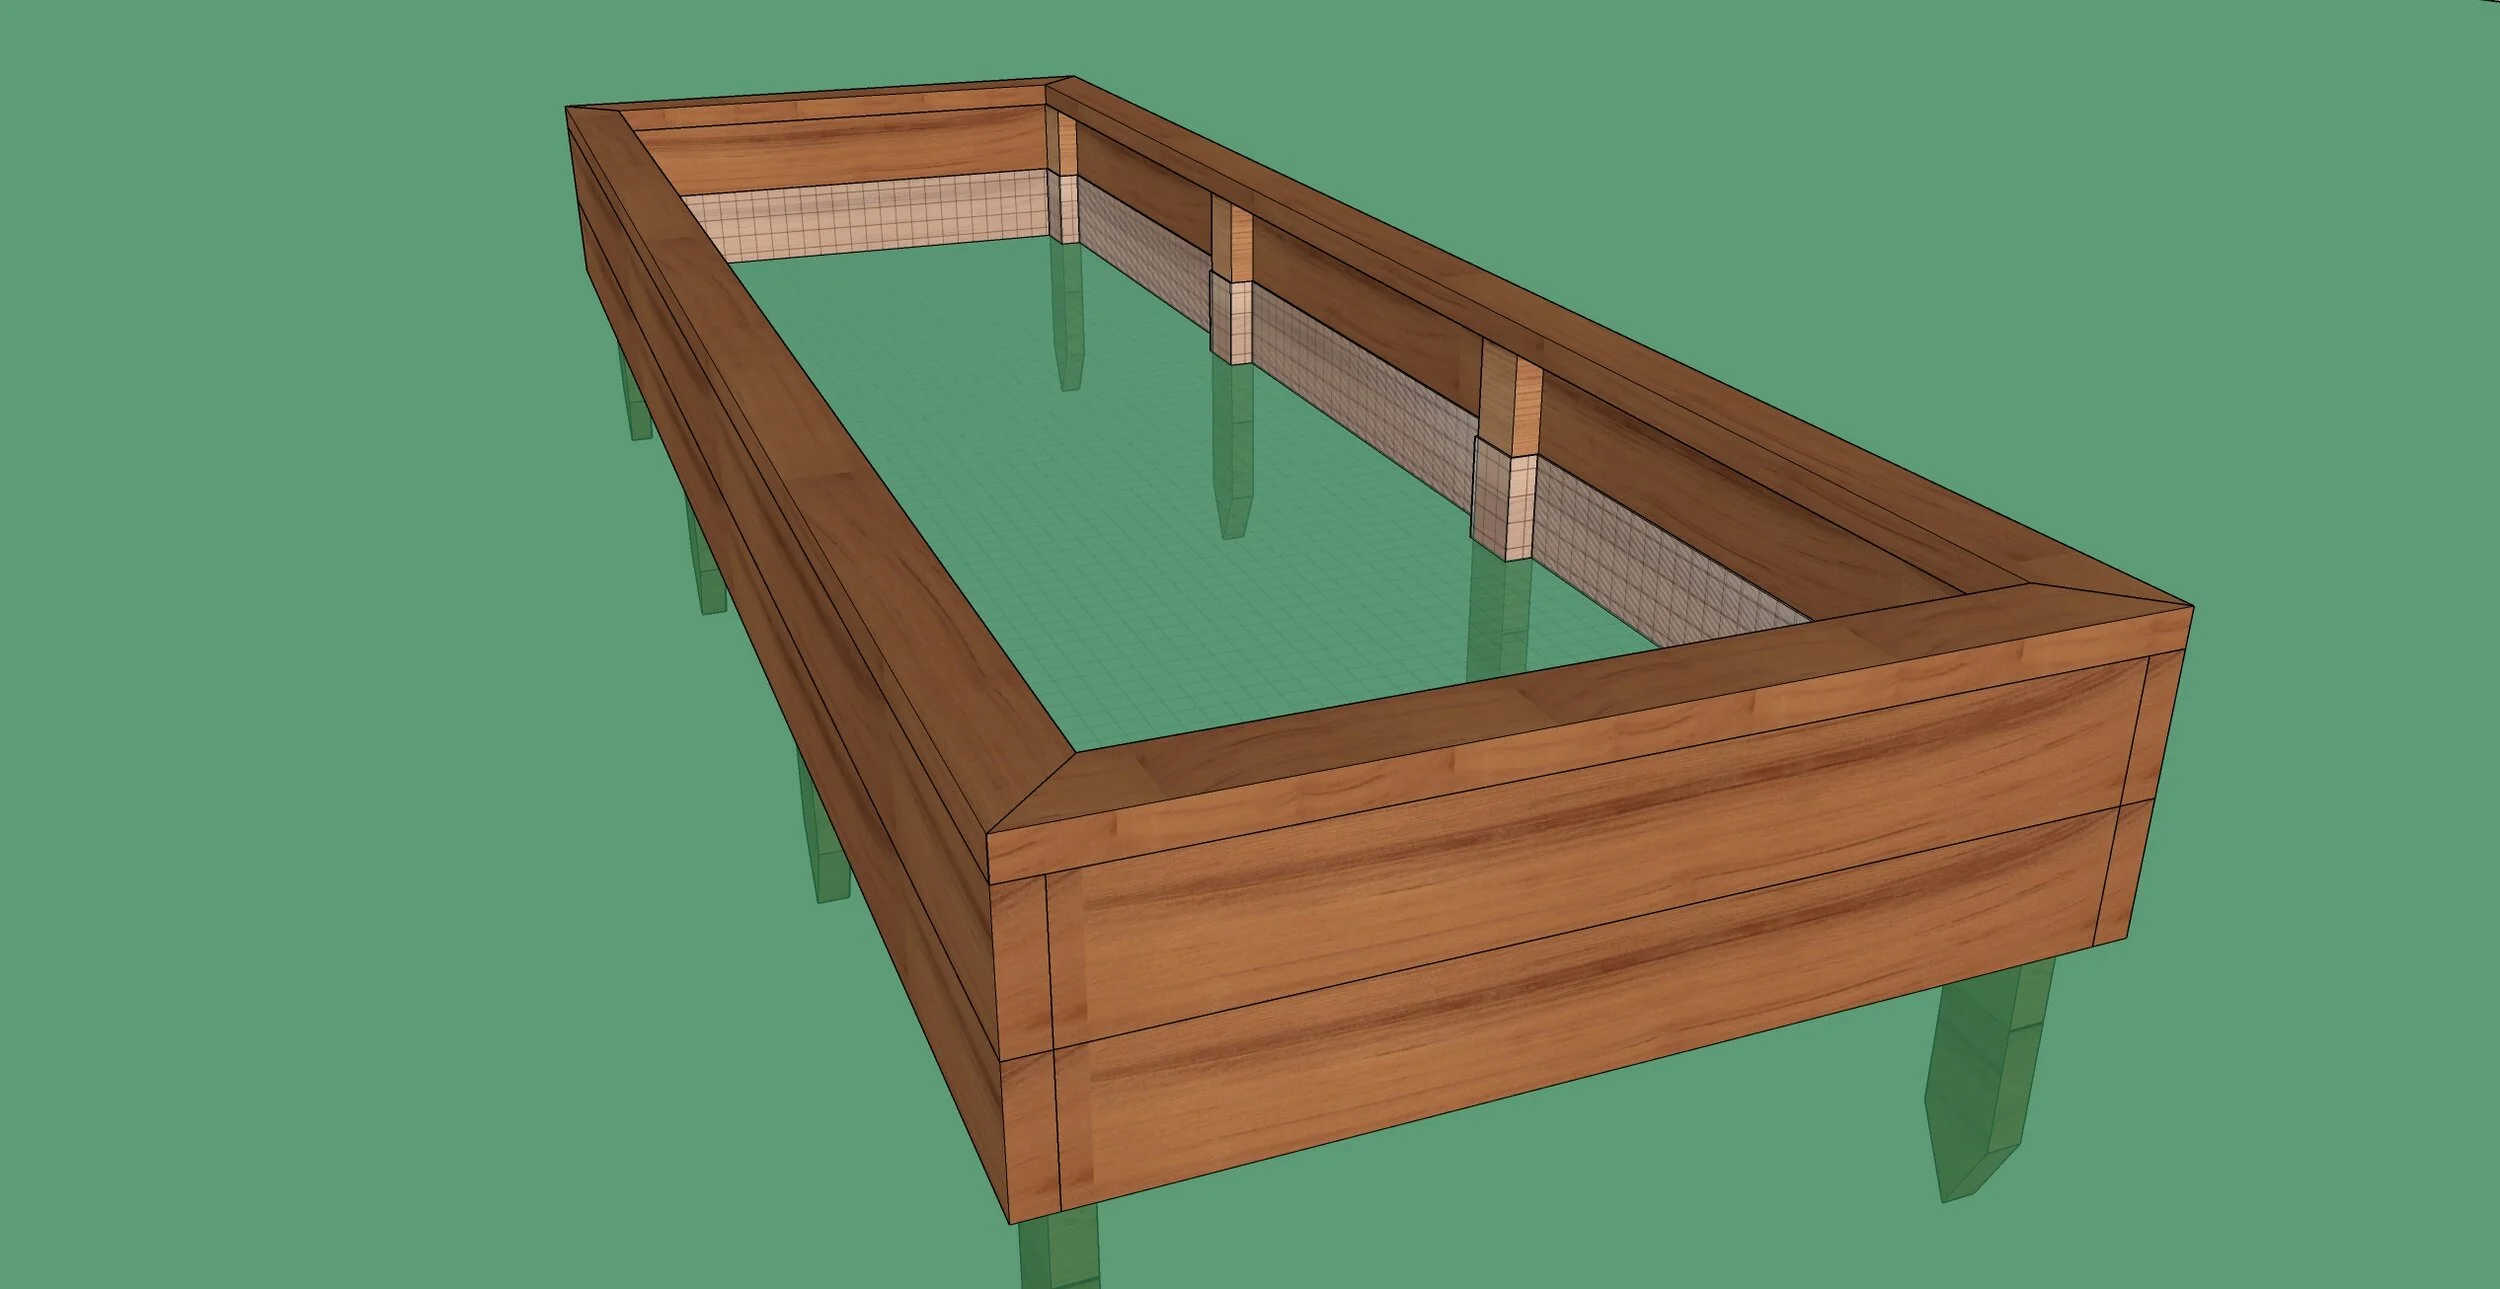
Next cut eight 24 inch long pieces of 2x4 to use as stakes. Cut off the ends to make them into a point. I used a circular saw for this but a jig saw works too - or a hand saw. Use a heavy hammer or sledge to pound them into the ground until they are about 7 inches above your existing frame (you will cut them off at the end).
Screw your frame into the stakes. Since I used 3 inch screws I did this at angles to keep the screws from emerging on the other side. The wood is 3 inches but when the screw head pulls into the wood the point can emerge and I didn’t want that to surprise anyone when gardening.

Add the second layer of your frame boards and screw them into the stakes as well. At this point you can use a hand saw or sawzall to cut the stakes flush to the top surface of the frame.

I was advised to add a layer of hardware cloth (1/2” steel wire mesh) to the bottom to keep gophers out so that’s what I did. I just stapled it in but had to make it conform to the stakes by cutting it strategically with tin snips. Gophers can be sneaky so I tried to be thorough with coverage.
As an optional finishing touch, I added a border with more 2x4s so sitting on the edge would be more comfortable and they would just look nice as well. Again, secure with 3 inch exterior screws. We ordered 30 1.5 cubic ft bags of raised garden bed soil from home depot and they dropped it off on a pallet in our garage. (masks on!)
https://www.gardeners.com/how-to/soil-calculator/7558.html
I hope whatever gardening project you take on this spring, it is a healing and comforting process. We are marveling at the new growth sprouting from tiny seeds in the window of Azadeh’s room.
All the best to you my friend! Love Walter
Oh, I almost forgot…
A few weeks ago you commented that you liked an instrument I posted and I was feeling the spirit so I took what I learned from my prototype and what materials were in my shop and made one for you. It should be arriving today.

I also made a stand that you can put your feet on to stabilize the instrument while you play, and turned a little connecting bolt and tuning wrench handle to match. The bridges and sides are maple and the darker brown elements are all walnut. The stand is made from white oak. The surface of the instrument is actually cheap plywood used for underlayment which is why it has character.

In the box you’ll find the instrument, stand, extra fishing line, a bendy metal strip that you can use to fish line out of the instrument if you are ever replacing a string, and the tuning wrench. Just take all the styrofoam off and pull out the dowels that are temporarily securing everything.

Bump on the stand

Recess in instrument - remove the connecting bolt entirely first.
Unscrew the connecting bolt and place the instrument on the stand. The stand has a bump that should fit into a recess under the instrument. Screw in the connecting bolt until snug but don’t overdo it. The instrument should be secure.
Now use the tuning wrench to tune the instrument. Both sides are tuned to the same notes! It may have shifted during shipping. Also the strings are settling in so they may go flat and have to be retuned every couple of days until they stop stretching. I did this daily for a week to get them settled as much as I could. All strings tighten when their peg is turned clockwise. The playing area is furthest from the pegs and the bridges are all actually glued in place. I find that plucking near the middle of the open part of the string creates a harp-like tone but experiment and play the thing all over.

I tuned it to a C major scale - white keys - but I think it could easily be tuned to a minor scale and create some nice color that way. Perhaps one side minor and the other major. I’m going to try that with mine.
I thought I might mess around with your instrument before I sent it just to give an example of ideas and techniques I found in my short time with it. I hope it’s helpful as an introduction to its possible voices.
I love you brother. All my love to you and your wonderful family. Thanks for giving me something to build during the rough portion of this sheltering at home. It was healing to be thinking of you while I worked on it.